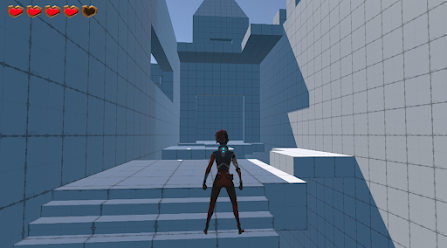
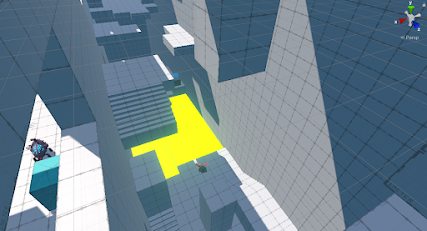
Some screenshots of the final version of the level developed for this class:
Saturday, May 25, 2024
Thursday, May 16, 2024
CAGD 373 Sprint Review 2
Sprint 3 (4/10–4/16), my second one, was relatively relaxed compared to the mountainous first sprint. During this sprint I UV-d and textured the mounted turret. The UVs required a few topographical touch-ups, but overall didn’t prove to be too difficult, just a little time consuming. When it came to the texture, I took a lot of advantage of normal and height maps to get the details I wanted, such as the vents on the barrel of the gun.
With this texture I also got to use some brush layers. I used a simple brush to put some dark scorch marks on the front of the gun, to give the impression of its use. I also used a brush to put the tan paint on the handles of the gun. Inspired by how physical artists give the impression of texture and wear, I used a sponge-y eraser to make the paint look chipped away with wear. The last element of the texture was using an alpha to put some text on the gun where appropriate.
I didn’t do as much work during this sprint as the others, but I probably needed a break after how much work the first sprint was for me. I recognize that having a large team was the reason I could spend so much time focusing on a single model—however, it was certainly a model that require that level of attention. Overall I took on some more general work going forwards, and everything worked out alright as we got all the modeling and texturing done with time to spare.
CAGD 373 Game Scene Review 1
Since the first sprint was just getting into groups and deciding on a game scene, the “first” sprint where I completed cards was actually sprint 2 (4/3–4/9). During this sprint I had a single yet goliath task: modeling the mounted turret.
Since I’ve never played Halo Reach before, the first step for me was collecting reference. I ended up using a lot of different references for this model because it looks different from the different angles. I tried to find a good side-view of the left and right sides, a three-quarter view, a top view, and even a back view. While these were immensely helpful, I still had a hard time telling how the inner cylinder of the gun was supposed to be shaped, since in all renderings it’s obscured by the shadows.
This was my first time making a prop this complex, and trying to make it all as one mesh definitely slowed things down. On my future props of a similar complexity, I made a blockout first before tackling them, just making sure each piece lines up on their seams. That being said, I’m still super proud of how the mounted turret turned out. I think I managed to capture the important details of the original model in a recognisable way. While studying the Halo turret, I noticed their attention to detail with how the gun parts slot together, and tried to follow that along to make sure I got each part. It was still very time consuming and I was quite stressed, but I learned a lot that would make my models better going forwards—and I ended up with a pretty cool model.
Featured Post
Aftershock Simulator Sprint 3
This is th e tutorial video I made for my team demonstrating how to use the objective system I designed this sprint. I’m really happy with h...

-
For the Simple DnD Map v3 assignment, Valerie played the rogue and Kyle played the ranger. Because of the new rulesheet and theme, I desig...
-
Sprint 3 (4/10–4/16), my second one, was relatively relaxed compared to the mountainous first sprint. During this sprint I UV-d and tex...
-
Sprint 3 was all about getting the game ready for the alpha build so we could present it at a public playtest. That means I focused on the o...


.gif)